Hello hungry peoples,
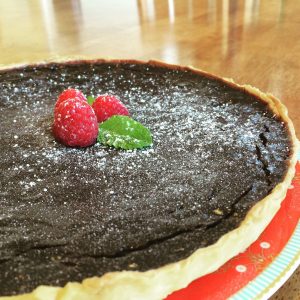
My hubby had a work barbecue recently and I wanted to bring something tried and tested but super delicious (now is not the time for risky behaviour). Poisoning my hubby’s co-workers could be somewhat limiting career wise, whereas an amazing tart would have them throwing bonuses all round. Money for everyone! I kid, all that was at stake was my pride in wanting to take something amazing. Silo’s chocolate tart perfectly fits the bill. I am a huge fan of copycat restaurant recipes and scour the internet for them. This is not one. This is the genuine real deal people, Silo’s chocolate tart!
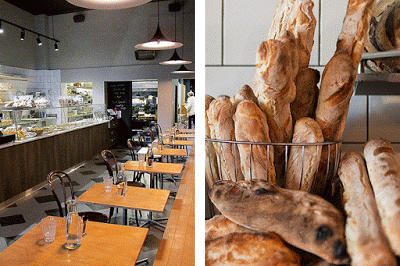
For those asking “what’s a Silo”, it is not the expected grain repository, it is a Canberra bakery institution located in Kingston (Silo’s Bakery). The bakery is so popular that it is a nightmare to get a table so I go less than I would like. Thankfully you can now reproduce a part of it at home. One of their signature dishes is their range of tarts, of which the chocolate tart is one of the best. One valentines day 15 or so years ago they shared the recipe in a newspaper article, which I immediately ripped out and have kept since, periodically taking it out and stroking it. “So precious, my precious etc etc”.
I have included a recipe for a shortcrust pastry base but I have to be honest, I rarely bother making the pastry. Sure if I am in the mood and feel like going to the extra effort I will do it but my mantra is that the filling is more important and that is where I like to expend the effort. Store bought shortcrust pastry is a totally appropriate substitute. The filling is super easy so no excuses for not making this amazing tart.
Ingredients
Tart Case
- 2 tbsp sugar
- 1 egg
- 1 1/2 cups self-raising flour
- Pinch salt
- Few drops milk or water
- 125g cold butter
Chocolate Filling
- 400 ml cream
- 160 ml milk
- 320g cooking chocolate
- 3 eggs
Cooking Directions
Tart CaseThis recipe is for the shortcrust pastry to line the base of your tart. Why shortcrust? Shortcrust pastry is perfect for the bases of tarts as it doesn’t puff up like puff pastry, has a biscuity/crumbly texture and resists absorbing fluid. Soggy pastry = sad pastry = sad me. Puff pastry is also quite different in that it has hundreds of butter layers, creating a more flaky and light pastry, perfect for the tops of pies. If you want to make pastry, shortcrust is significantly easier due to its simpler composition. The general rule for making shortcrust is a general half fat to flour ratio. The fat may be in the form of lard, butter, shortening or margarine. Personal preference really but the results will vary a bit. I like butter, because…well…it is delicious! The fat coats the flour reducing gluten development, essentially producing a “short” pastry (e.g. crumbly).
- Preheat your oven to 180 degrees C.
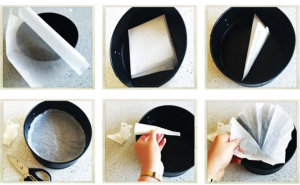
- Grease a pie pan with butter. There is a great trick to creating a round of baking paper to cover the base of your pan. Cut a square of baking paper that covers you entire baking pan. Fold the square in half. Fold it in half again. Fold the quarters again. You have now moved from folding squares into folding more triangular shapes. Fold in halves until they are very tight. Place the central point of your folds in the middle of the pie pan and cut off the end that sits outside the pan. Unfold your baking paper and you will find it has formed a circle that is just the right size for your pan. Line your pan with the baking paper.
- Now to make the dough. Rub 2 tbsp of sugar and 125 g of cold butter into the flour. This is easier if you cut the butter into chunks. The sugar helps to protect the flour from the water, reducing gluten development. Add a pinch of salt. Mix the beaten egg in. Mix a bit of milk or water if the dough seems too dry. Chill in the fridge for 20 minutes. This sets the dough and will make you life so much easier when it comes to rolling.
- Roll the dough into a disk about 0.5 cm thick. Try not to mess with it too much as working the dough increases gluten development (e.g. makes it stringier). Lay it in your pie pan and press the dough down along the base and edges. You now need to blind bake the pastry. Blind baking browns and cooks the pastry slightly, helping to keep it crisper when you put your wet filling into it. Some people will not bake any sort of pie without it. Cover the pastry with either alfoil or baking paper.
- Place something in the pan to keep the pastry from puffing up while it blind bakes. If you have baking weights, that is perfect and you should use them. Dried beans or rice are also totally appropriate. Just make sure you have lined the pastry as you do not want uncooked rice in your pastry. Broken teeth does not make for a delicious meal.
- Bake the pastry at 180 degrees C for 10 mins. The pastry should be starting to get golden but will also still look a bit uncooked. Now we move on to the most important part the ooey gooey chocolate filling.

Chocolate Filling
- Turn the oven up to 200 degrees C. It should still be all warmed up from baking the pastry shell.
- Heat the 400 ml of cream and 320 g of chocolate in a small saucepan until just combined. I tend to use dark cooking chocolate but milk is also perfectly acceptable if you want a sweeter rather than richer tart. Good quality chocolate will produce a better result. You can get Lindt cooking chocolate in deli’s and it makes an amazing tart. I heartily recommend it.
- Take the cream and chocolate mixture off the stove and let it cool down slightly.
- Whisk the 3 eggs and 160 ml of milk together. Whisk this into the slightly cooled chocolate mixture. Do this quickly so everything incorporates nicely and you don’t make scrambled eggs.
- Place the mixture into the tart case, filling it up. Off course you have removed the pastry weights/beans/rice first right? Cause it would be just crazy to pour the mixture on top.
- Bake for 20 minutes. The tart will be very bubbly when you take it out of the oven. I let it cool on the bench which is what has caused the cracks. If you are more patient let it cool with the oven door open. That will prevent cracking. Once it has cooled it is ready for eating. Hmmmm, chocolicious!

Difficulty: Easy peasy
